
We got a new hot glue gun. Lydia and Zoe were itching to try it out so we decided to make turtles using some materials we had laying around the house. We based this on an idea we saw pinned on Pinterest from etsy. Looks like you can’t get the pre-made craft kits anymore but it’s easy enough to do it with materials you have on hand at home.
What you need
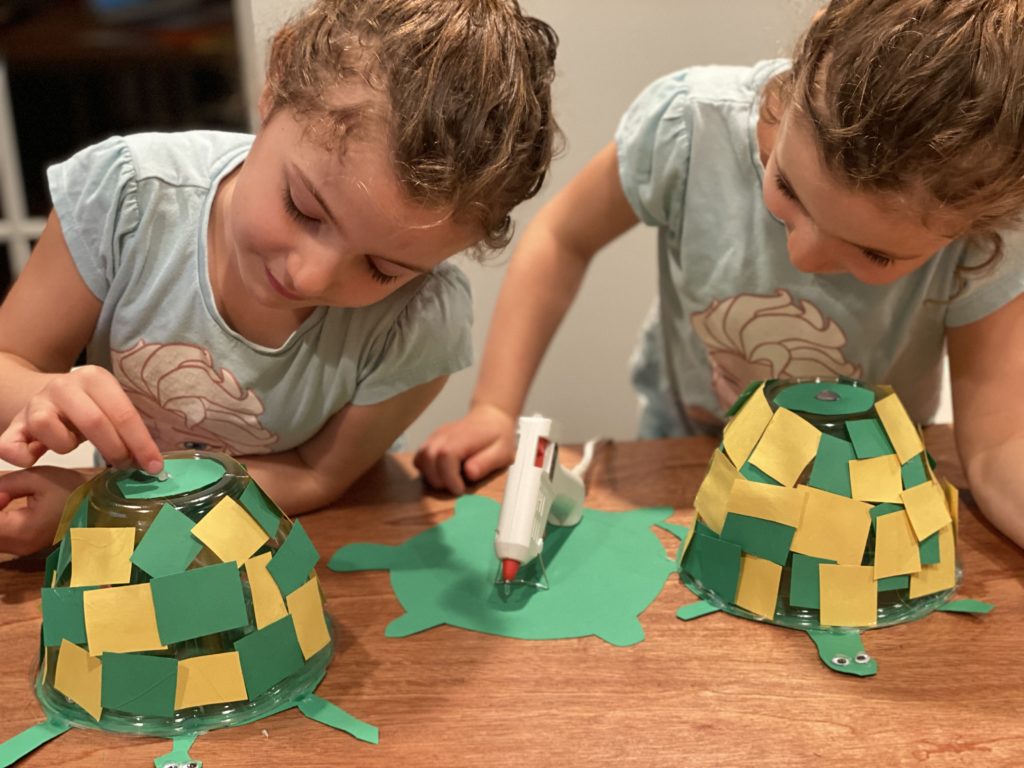
- Round plastic container (a recycled salad or fruit container works well…)
- Contruction paper
- Pencil
- Hot glue gun & glue (or any type of glue, hot glue just speeds things up a bit)
- Googly eyes
What we did
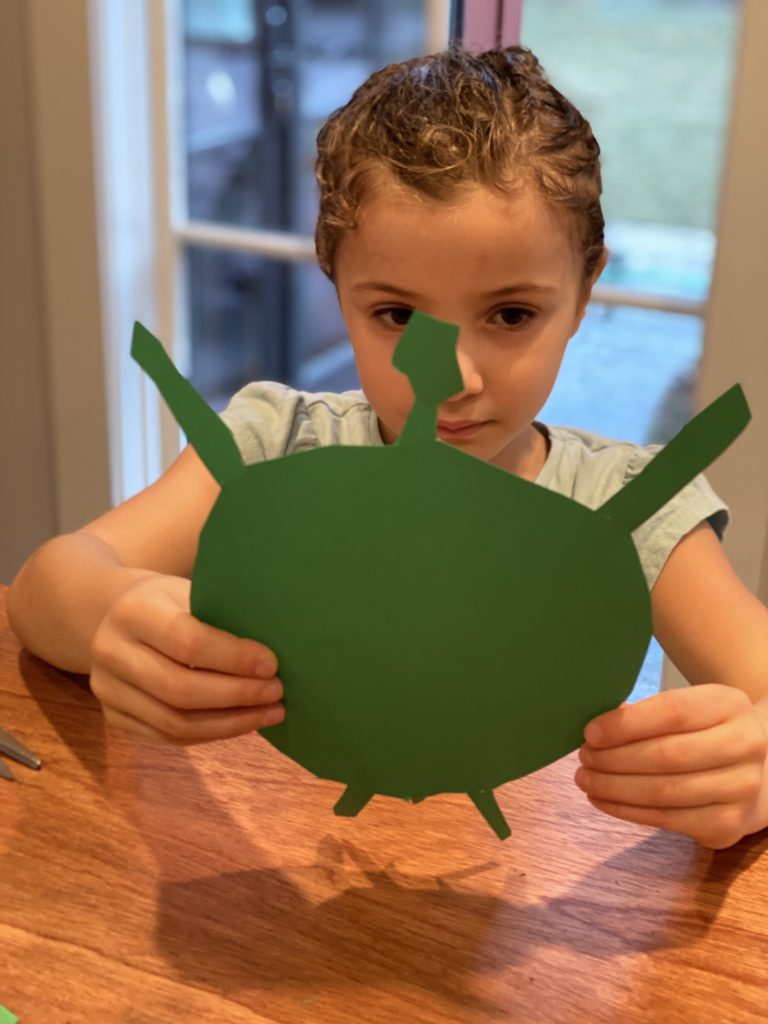
We started by tracing the bottom of the container onto a piece of construction paper.

Then we drew the legs, tail and head around the edge of the circle to make the turtle body.
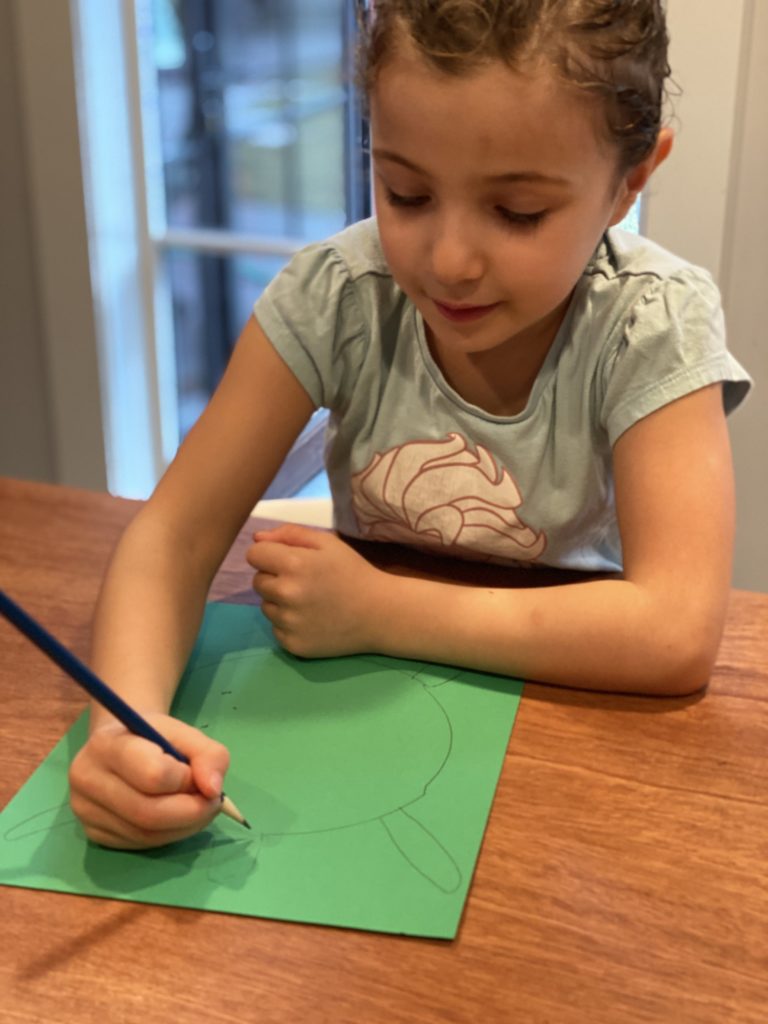
Next cut out the body template out and set it aside.
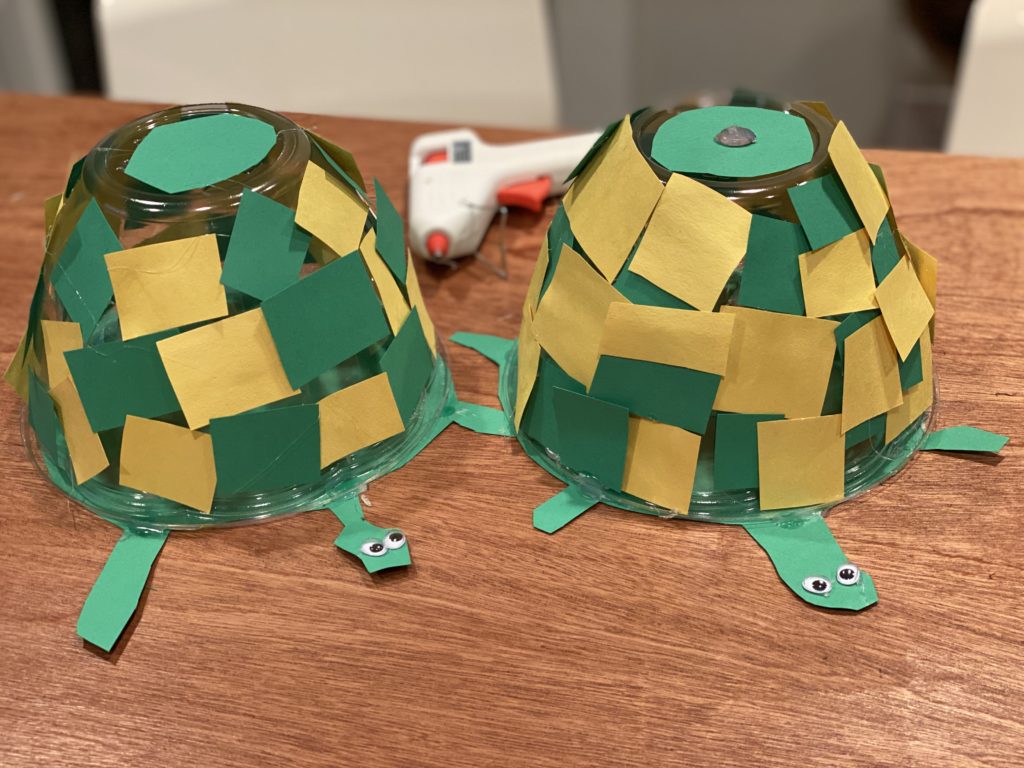
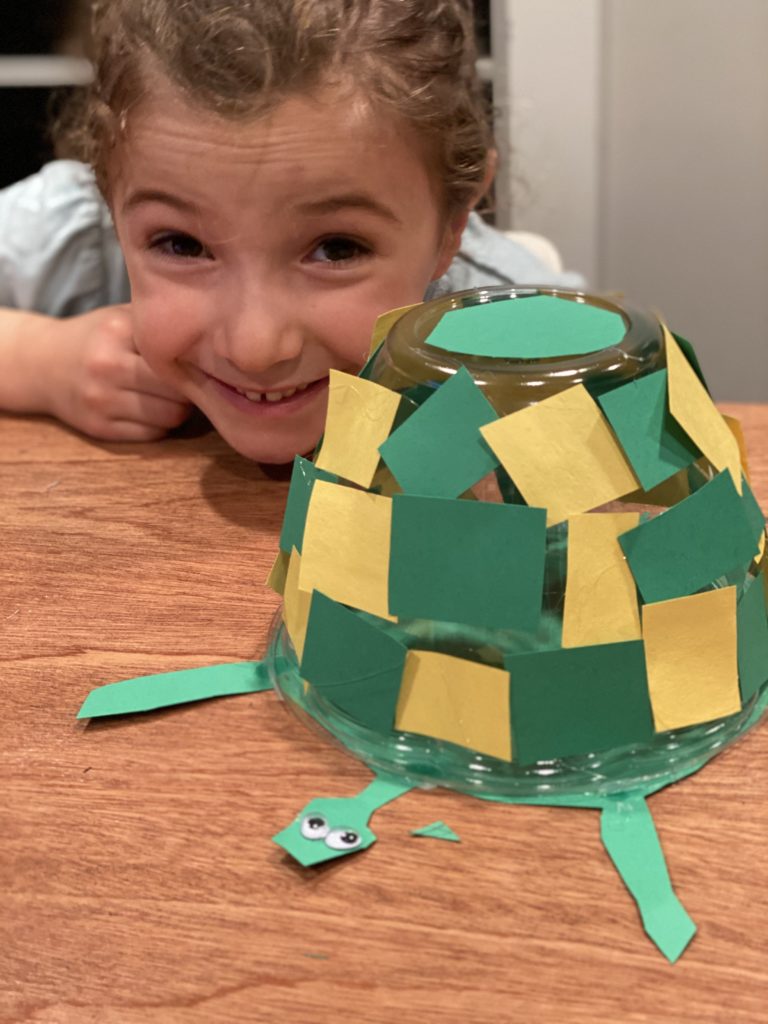
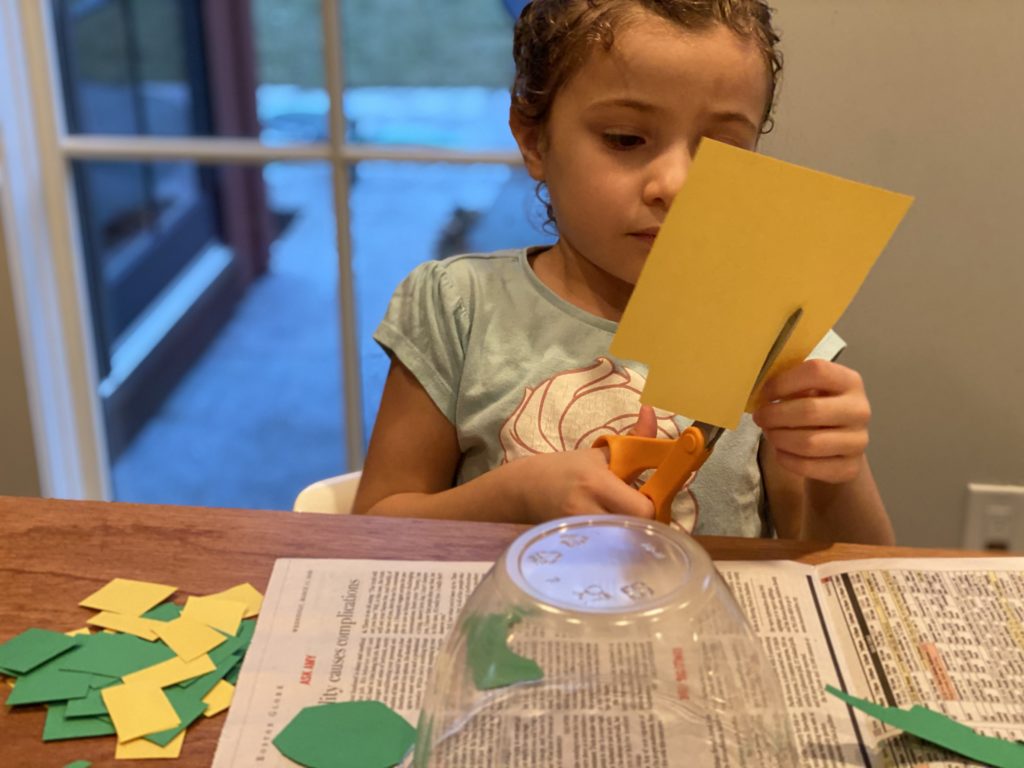
Now for the shell. Start by cutting strips of construction paper. Then cut the strips into squares. We used yellow and green.
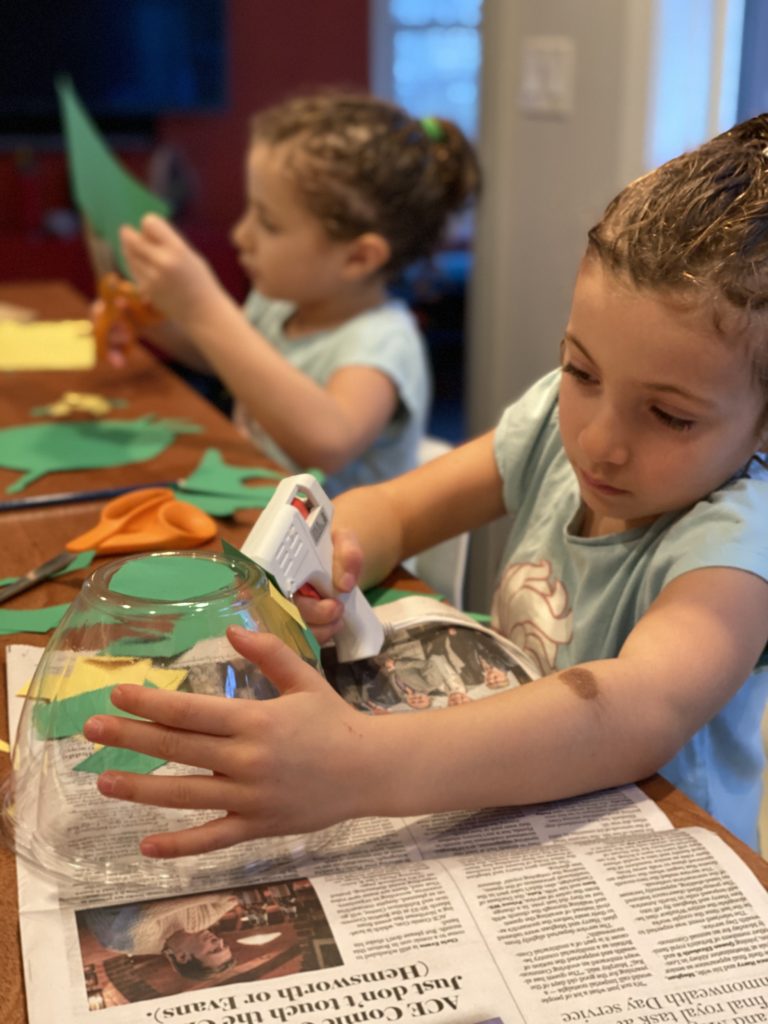
Attach the squares to the shell with hot glue. We didn’t follow a specific pattern but generally used one color then the next as we worked our way around the shell.
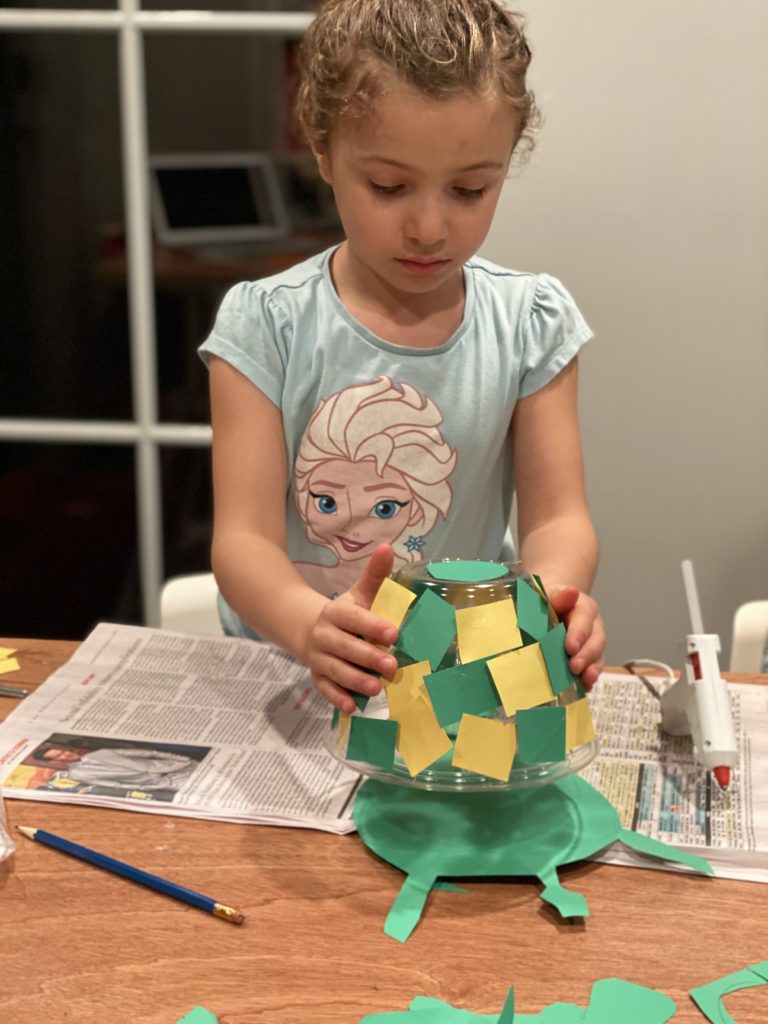
Next attach the shell. Put a few dabs of glue around the outside edge of the body template first.
Last but not least attached the googly eyes and any other embellishments. We put dried hot glue dots on top. The girls were fascinated with how the glue dried.
What we thought
We had a lot of fun, especially since we were using our new hot glue gun!! So much to learn including not to touch the hot end — ouch! We ended up spreading this out over a couple of hours as it was pretty time intensive but you can speed things up by cutting out the bits and pieces first. Lydia and Zoe did all of the prep work for our turtle craft in addition to actually putting the turtle together so that took some time. All and all we enjoyed the process and the product. Would definitely recommend this project to anyone who wants to make a turtle craft with their kiddos!